
Schedule trigger allows you to schedule a pipeline to run periodically (hourly, minutely, daily, weekly and monthly). When creating a schedule trigger, you can specify a schedule (start date, recurrence, end date etc.) for the trigger, and associate with a pipeline.
In general, we can create a schedule trigger to automate the execution of pipelines at specific intervals.
Lets, create a schedule trigger to execute a pipeline automatically at a specific time interval.
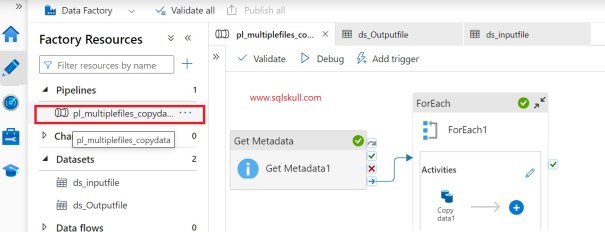
Log into Azure Data Factory portal, and you can see here we have a pipeline created which copy multiple files from one folder to another.
Now, we will execute this pipeline at a specific time interval using schedule trigger.
Creating schedule trigger
There are two options to create a trigger, first is just open the pipeline and inside the pipeline canvas you will see a Add trigger button as shown below.

Second option is that, click on Manage tab, then inside Author section select Triggers and click on New button or Create trigger button.

In both options, you will get similar experience. Lets continue with second option.
Click on New button. Then select the type of trigger as Schedule Trigger.
Specify the start datetime of the trigger for Start Date. It’s set to the current datetime in Coordinated Universal Time (UTC) by default. In our case, we select the India time zone.
Next, specify Recurrence for the trigger. Select one of the values from the drop-down list (Every minute, Hourly, Daily, Weekly, and Monthly).
After that, if you want to set end date for trigger then click on Specify an end date option to specify an end date.

Just scroll down the page, provide end date, then select the Status as Started to activate the trigger. You can use this checkbox to deactivate the trigger later.
After that, click on OK button.

After that, click on OK. It asks you to publish all the changes to activate the trigger.
Select Publish tab to publish the changes. Until you publish the changes, the trigger doesn’t start triggering the pipeline runs.

Now, associate this trigger with a pipeline. Go to Author tab, select pipeline then inside the pipeline canvas click on Add trigger button.
After that, select New/Edit option then select an existing trigger that we just created.

Once you select existing trigger, it opens the trigger configuration.
Here you can verify all the details such as trigger type, start date, end date, time zone, and recurrence of trigger.
If you wish, you can make any changes otherwise click on OK button.

Make sure you publish all changes, just on Publish button.
You can also publish all your changes, go to Author tab, at the top you will see Publishing tab. Just click on that.

Once, you publish all the changes, just wait for the specified time to run the trigger.
In our case, trigger is scheduled to run on date 18th July 2023 at 8:21 PM IST time.
Now, go to Monitor tab, inside Runs section click on Trigger runs. Click on Schedule tab and you can see the trigger runs successfully at specified time.

Now, click on Pipeline runs tab to see the pipeline runs triggered by the scheduled trigger.
You can see, pipeline runs successfully.

Note that, in this demo we have scheduled the recurrence for the trigger at every 15 hrs. If you wish you can explore other recurrence options such as Minutes, Hours, Days, Weekly and Monthly.

Also Read..
Create Azure Data Factory using Azure Portal
Azure Data Factory ETL – Load Blob Storage to Azure SQL Table
Pivot Transformation Using Data Flow Activity
Wait Activity in Azure Data Factory
Copy multiple files from one folder to another using ForEach loop activity
![]()