
Azure storage account is used to store azure storage data objects such as blobs, files, queues, tables, and disks.
Following are the steps to creating and configuring a storage account using the Microsoft Azure Portal (www.portal.azure.com)
Log in to your Azure account, go to the Home page.
In Home page, if you see a storage accounts service tab on your home screen as shown below, just click on that.

If you do not see a storage accounts service tab then go to search bar, and just start typing ‘storage accounts’ you will see an azure storage accounts tab will appear in your search list, then click on storage accounts tab that appears your search list.

After that, it navigates you to Storage accounts page > Click on Add button

Once you click on add button> a Create storage account window opens.
> choose you subscription > select Resource group, if you have already created a resource group and want to use that otherwise you can create new rescource group ( click on create new)

Scroll down on screen you to see the complete fields such as , storage account name , location, performance, account kind, replication, and Acess tier.
Storage account name : Provide a name for your storage account that must be unique across Azure, and validate by azure itself for uniqueness.
Location: Provide a location for your storage account, or you can use default selected location.
Performance: Standard , you can use default selected value.
Account kind: StorageV2, you can use default selected value.
Replication: Read-access geo-redundant storage (RA-GRS), you can use default selected value.
Access tier: Hot , you can use default selected value.

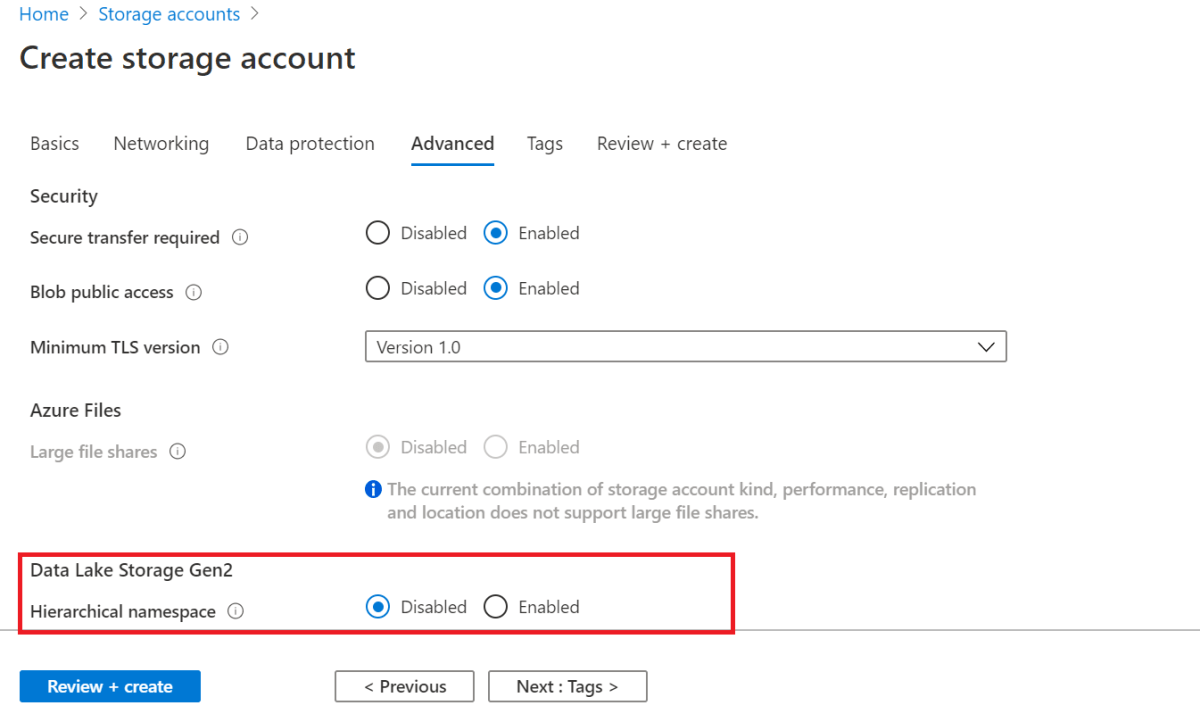
If you want to use Azure data storage Lake, then click on the Advanced tab, and then set Hierarchical namespace to Enabled, By default it is Disabled.
Next click on Review+Create button, to review your storage account settings and create the account.

After reviewing you storage account setting, click on Create button.
Next, After clicking on Create button, you get a message on your screen, as well as a pop up notification on the top left of your window screen saying that a storage account deployment is completed.

Now go to Home page, there you can see you azure storage account appears in grid cell.

Next, Click on your azure account (oneazurestorageaccount) on grid cell.
Your storage account window opens, there you can see Azure Storage data objects such as contains, file share, tables tabs and so on..

If you want to read more on Azure storage account and it’s types, you can refer microsoft documentation- read
Also Read..
Upload Files to Azure Storage container
![]()